|
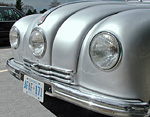
1. Open "TheCar.TIF" file and optimize the image:
Menu:>Image>Adjust>Levels
2. Select the "Color Sample" tool. Double click the
tool and set the "Sample Size" to "5x5 Average".
3. Place 3 cross-hairs on the photo: #1 on a dark gray;
#2 on a mid-gray
and #3 on a light gray
4. Notate values for cross-hair
#1 and determine a "target"
number:
|
| |
a) if
3 values are random use the average
as the "target" number
b) if 2
numbers are close, average
those 2 and use as the "target"
number
{see
table below}
|
5.
Repeat step 4 for cross-hairs #2 & #3
6. From the menu select curves and color balance RGB value for
neutral (page 200 Ben's Book) |
| |
Menu:>Image>Adjust>Curves
- select the "Red"
curve and click on the curve to add a point
-click the leftmost point (dark)
and enter the
low red value for "input" and fir "output"
enter the value determined in step 4 above.
-click the middle point and enter the mid red value for "input"
and "output"
-click the right most point (light)
and enter the
high red value for "input" and "output"
{repeat for the "Green" and "Blue" curves}
|
7.
Select the license plate and copy to new layer.
8. Place another picker on the white area of the plate
9. From the menu select curves
and color balance RGB value for neutral. |
|
{Hint:
picking a lighter value
to balance RGB curves will brighten the license
plate}
|
 Lesson
1:
Using curves to color balance an image.