|
Bob DiNatale’s Studio Forum The New Adobe Digital Image Workflow “From Ingesting to Output” |
|
|
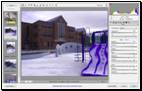
Adobe’s 4 new Software exploding into our digital world
With the release of these new Adobe Software… We will have to rethink, or at least revisit, our Digital Image Workflow. |
|
|
I have written a 3 section document addressing
the Digital Image Workflow. The 1st section is a generic
overview while the 2nd and 3rd sections focus
on Adobe’s 4 new Digital Imaging software and their impact on
the workflow. Studio forum members can download
the MS Word document and adjust the workflow to meet your needs.
(Click
Here) (1) 1. an Overview of the Digital Image Workflow* (Click Here) 2. a detailed version of my New Adobe Digital Image Workflow (Click Here) 3. Pros and Cons of
these 4 Adobe Software and how is supports each step of the * Note: Everybody has their own personal software and techniques for processing the digital image. However, after much discussion and processing, I am more convinced than ever that there is an order to the steps of any good Digital Image Workflow.
(1) Studio Forum Members, I have also: · noted features of these Adobe software that influenced the Digital Image Workflow not stated or obvious in the literature. · included a blank “Pros” and “Cons” sheet for you to note your observation which we can discuss at our next Studio Forum meeting. |
|


|
Bob DiNatale’s The Digital Image Workflow “From Ingesting to Output” An Overview |
|
Although we may all have our own personal workflow and favorite software, I am more convinced than ever that there is an order to the steps of any good Digital Image Workflow. What follows is an order of necessary step from transferring our digital photograph from the camera to their final output to print, web or video... “From Ingesting to Output”. |
|
Capture: The scope of this discussion will be the Digital Image Workflow - after you’ve taken your digital photographs. Although photography will not be discussed, the importance of a good quality exposure for its affect on quality output cannot be stressed enough. Suffice to say that you want to make a good exposure. We’ve all heard about “exposing to the right” and, if you’re old enough to remember film, there was a similar adage, “get it on the film” - both ensured there would be enough captured information to be processed. With that said, let’s follow our digital photograph throughout the Digital Image Workflow… “From Ingesting to Output”. I. Ingesting:
II. Processing: · “Global” Adjustments: - “digitally developed” images for Global Tonal Shaping. · “Selective” Image Enhancements: apply non-destructive image editing to selected areas. III. Outputting: Output selected “processed” files for high quality prints, the web, and video/slideshows. |
|
Bob DiNatale The New Adobe Digital Image Workflow “From Ingesting to Output” Detailed Workflow
|
|
|
I. Ingesting: {Adobe LightRoom / Bridge 3 / Adobe DNG Converter} Here is where you transfer/import your images from you digital camera/camera flash cards to your computer. During transfer you will convert, rename, and add information, backup and then organize/review your files for Process and Output. 1. Transfer (& Convert): a. Copy your files from your camera/camera card to your computer. If desired, you can also copy the original files to another location simultaneously. b. If importing Camera Raw files, you can convert to DNG format while transferring. Tips: i. Importing from your camera card or field storage device is preferable then ingesting directly from the camera. ii. Copying your digital images to the same location on your hard drive each time you transfer can be helpful and simplify the transfer process. You can then distribute your transferred files throughout your organization structure. (An obvious advantage to me has been the initial back-up of transferred files.) iii. There are many advantages for converting your proprietary camera raw files to Adobe's open DNG file format: one is the compressed file size with no data loss and another is its ability to store a great amount of metadata information without the need of an additional sidecar information file. 2. Renaming the Camera File: The intent here is to change the strange camera file name into something meaningful that can be used as an aid for storage and retrieval. Naming a file “Girl with bright eyes under blue sky” is pretty descriptive, quite memorable but not really helpful when trying to retrieve it two years after it was taken. (BTW, these seem more like keywords to me.) However, we will always remember that the “Girl with the bright eyes” was on that “West 75 Tucson trip”! That information, along with thumbnails and good keywording, is enough to home in on a folder or hard drive where that file resides. That is why I think the date the photo was taken is a wonderful aid for storing and retrieving your images. a. The renaming convention I use is based on a 6 number date (the photo was taken) with a 4 digit number added to it. It looks something like this… [YYMMDD_####.ext] or [051225_0001.dng] or photos from Christmas of ‘05. Tips: · Unless you plan to be around in the year 2100, you can use the 2-digit year [YY]. For those of us having digital images from the last millennium (or planning to be here for the next one) you can use a 4-digit [YYYY] year to make sorting all your files easier. · As for a serialized number convention, you can use continuous numbering or start a new series each time you import. Because every day has a unique date, the filename number will be unique – unless you shoot more than 10,000 per day. The numbering may vary depending on the type of shooting… if it is a client shoot, you might start the serial number at 0001 to keep track of the number of images taken for the job. · If you’re so inclined, you can always “preserve the original camera file name” in your DNG file when importing for later renaming. 2. Add Your Copyright and Other Metadata: a. Adding your copyright information before backing up your files insures that it will be on all your images. You can reference a file with your copyright information to make this task very easy. b. Add any generic keywords that are pertinent to the files being transferred: “Royal House, Medford, Massachusetts, USA, North America”. More “image specific keywording” can be added later. c. During transfer, you can fine tune the color fidelity of your images by adding a camera calibration setting for the camera used to photograph the images.. 3. Organize Your Files: Here is where you will Review (Label, Select, Rate) and Delete your images. Be aggressive with deleting. When I first started storing my files I kept everything. After nearly 10 years of imaging, I am getting more aggressive with my “deletes”… especially using 8, 10, and 12 megapixel cameras. The storage and backup of non-usable images can get overwhelming, be a waste of time and will have you avoid backing up your files!
- RED (files to delete) and YELLOW (images for a 2nd review). ride 6 & 7 keys If the software supports “stacking”, I will use it as an aid for deleting unwanted bracketed series.
I can’t help but notice how the Red/Yellow/Green of the first two review steps is similar to a traffic light… RED = warning to Delete; YELLOW = Caution to Review; GREEN = Go to Continue.
Needless to say there is no one convention. Define a convention that is logical to you and be consistent. Any good labeling system should easily be modified as long as a convention is followed. 4. Backup Transferred Files. a. Back-up the newly transferred images to your existing archived digital image photo database. Tip: ·
This will be the first
of many times you will back up your images. It is important that |
|
|
II. Processing: {Adobe LightRoom / Camera Raw 4.0 and Photoshop} I approach processing digital images in two stages: “Global” and “Selective” adjustments second for image enhancements. “Global” Adjustments: LightRoom/ Camera Raw 4.0 This is where I “digitally developed” selected camera raw images for Global Tonal Shaping. Adjustments are made for Exposure, White Balance, shadow and highlight, overall color cast, noise reduction, lens correction, etc. The adjustments done here, using Adobe’s Lightroom; Bridge & Camera Raw, will be output to proof prints for approval and posted on my website for client review.
“Selective” Image Enhancements: {Adobe Photoshop} If “Selective” image enhancement is necessary, I will open my globally adjusted camera raw image in Photoshop as a “smart object”. I then apply any pixel replacement and non-destructive image editing to selected areas for the creative expression. [See TheSmartSystem] (Currently there is no acceptable way to open a Camera Raw file in Lightroom.) (You may have to re-import any newly created files into Lightroom) |
|
|
III. Outputting: {Adobe LightRoom and Photoshop} In this step of the digital imaging workflow, I will resize or resample my “Processed Images” for final quality output considerations… to print, the web and video. a. Here is where Lightroom excels. You can output selected files for customized slideshow, consistently high quality prints and sophisticated web pages in HTML or Flash with a click of a button. b. TheSmartSystem. Prepare TheSmartFile for the desired image size and resolution of the intended output with no loss in image quality. Scale the Z temp file to print a prime… Delete or save the Z-temp file?
And Lastly: Did you notice I said nothing about the RED - “Delete” images? Your call here, I eventually throw these away prior to my next backup or… when I feel really comfortable… or maybe not at all! As I said, I am getting more aggressive with my “Deletes”… it just is taking a little time. |
|
|
Bob DiNatale The New Adobe Digital Image Workflow Pros & Cons |
||||||
|
Ingesting: {Adobe LightRoom / Bridge 3 / Adobe DNG Converter}
Anything that can be done by both software will not be noted. Only the uniqueness of each software pros/cons will be noted. Once entered, rate all points on a scale of 1 to 5 with 5 being the most important
|
||||||
|
Processing: {Adobe LightRoom / Camera Raw 4.0 and Photoshop} I Process images in two steps: the first for “global” adjustments… Lightroom /Adobe Camera Raw; the second for “selective” image enhancements… Photoshop “Global” Adjustments: {Adobe LightRoom / Camera Raw 4.0} In the global 1st step, I will “digitally developed” my “selected images” for contacts prints and to post on my website for review and approval. “Selective” Image Enhancements: {Adobe Photoshop} Here I will open up my camera raw image as a smart object and apply any pixel replacement and non-destructive image editing for the creative expression. [ See TheSmartSystem ]. (Depending what process you use, you may have to re-import any newly created files into Lightroom)
Once entered, rate all points on a scale of 1 to 5 with 5 being the most important
|
||||||
|
Outputting: {Adobe LightRoom and Photoshop} In this step all of the digital imaging workflow, I will resize or resample my “Processed images” for final quality output considerations… for the print, the web and video considerations.
Anything that can be done by both software will not be noted. Only the uniqueness of each software pros/cons will be noted. Once entered, rate all points on a scale of 1 to 5 with 5 being the most important
|
||||||